There is nothing quite like the rumble of a classic V8 or the sleek lines of a vintage coupe. But there is also nothing more frustrating than sitting in your prized possession, turning the key, and hearing only a sluggish click because your battery is dead again. If you own a pre-1960s vehicle, you likely know this pain well. The original 6-volt electrical system was charming in its simplicity but woefully inadequate for modern driving demands. It struggles to power headlights at night, lets the radio fade out when you roll down the windows, and requires constant maintenance to keep the generator happy.
The solution isn't to abandon your classic; it's to upgrade it. Converting your classic car from 6 volts to 12-volt systems is one of the most impactful modifications you can make. It transforms a temperamental antique into a reliable daily driver without sacrificing that authentic vintage soul. This guide walks you through the essentials of swapping generators for alternators and rewiring your chassis to handle the new power load safely and effectively.
Why Convert from 6 Volts to 12 Volts?
You might wonder if the hassle of rewiring an entire car is worth the effort. The short answer is yes. The long answer involves physics and reliability. A 6-volt system operates at half the potential energy of a 12-volt system. To deliver the same amount of power (watts), a 6-volt system must push twice as much current (amps). Higher current means thicker wires are needed to prevent overheating, and more heat is generated within the components themselves.
When you switch to 12 volts, you halve the current required for the same workload. This reduces strain on your switches, relays, and wiring harnesses. More importantly, it allows for better charging efficiency. Old-style DC generators often struggled to charge batteries fully while idling, leading to parasitic drain issues over time. Modern alternators produce consistent output even at low RPMs, ensuring your battery stays topped up during city driving or traffic jams.
Consider the lighting alone. Stock 6-volt bulbs are dim by today’s standards. Upgrading to 12-volt halogen or LED options provides significantly brighter illumination, improving safety for you and other drivers on the road. You aren’t just fixing a problem; you’re enhancing the entire driving experience.
Alternators vs. Generators: Making the Right Choice
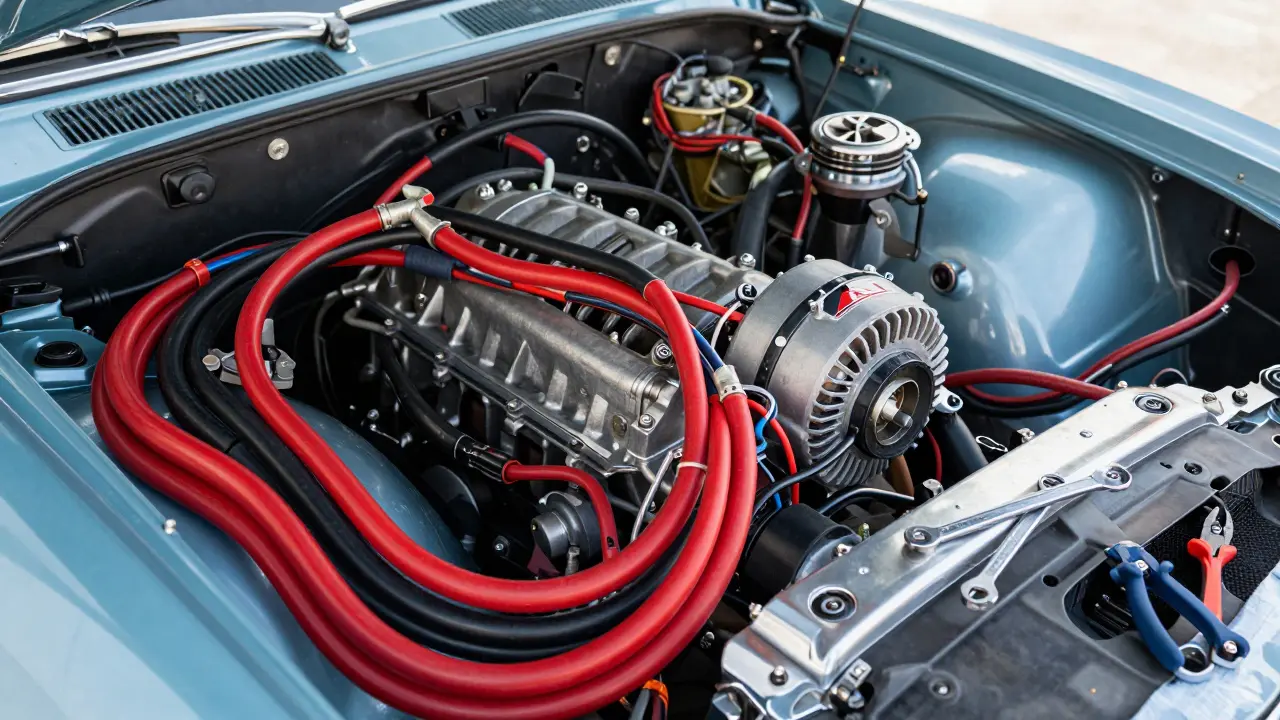
The heart of any 12-volt conversion is replacing the old DC generator with an AC alternator. While both devices convert mechanical energy into electrical energy, they do so in fundamentally different ways. A generator uses brushes and commutators to create direct current directly. An alternator creates alternating current first, then rectifies it into direct current using diodes.
Here is why the alternator wins every time:
- Efficiency at Low RPMs: Generators need high engine speeds to generate sufficient charge. Alternators work efficiently even when idling.
- Maintenance-Free Operation: Most modern alternators use brushless designs or durable carbon brushes that last thousands of hours. Generators require frequent cleaning and adjustment.
- Higher Output Capacity: You can easily find alternators producing 50 to 100 amps. Standard generators rarely exceed 30 amps, which is insufficient for cars with air conditioning, power steering, or auxiliary lights.
However, not all alternators are created equal. For a classic car conversion, you generally have two paths: a custom-built unit designed specifically for your model year, or a universal aftermarket alternator mounted via an adapter bracket. Custom units look factory-correct and bolt on directly, preserving aesthetics. Universal units offer flexibility and higher amperage options but may require fabricating mounts and routing belts differently.
| Feature | DC Generator (Original) | AC Alternator (Upgrade) |
|---|---|---|
| Output Type | Direct Current (DC) | Alternating Current (AC) converted to DC |
| Charging Efficiency | Poor at idle, good at highway speeds | Consistent across all RPM ranges |
| Typical Amps | 10-30 Amps | 40-100+ Amps |
| Maintenance | High (brushes, points, insulation) | Low (mostly plug-and-play) |
| Voltage Regulation | External mechanical regulator | Internal electronic regulator (usually) |
Understanding Voltage Regulators
In a 6-volt setup, the voltage regulator was a separate box under the dash containing relays and resistors. In a 12-volt conversion, this component changes dramatically. Most modern alternators come with internal regulators, meaning the "brain" of the charging system is inside the alternator housing itself. This simplifies wiring significantly.
If you choose an externally regulated alternator-common in high-performance builds-you will need to install a new external regulator box. These allow for precise tuning of output voltage, which is useful if you run heavy electrical loads like winches or large audio systems. However, for most classic car owners, an internally regulated alternator is the best balance of cost, complexity, and performance.
Pay attention to the sense wire. Some alternators require a dedicated wire connected directly to the positive terminal of the battery. This "sense" wire tells the alternator exactly what voltage the battery sees, allowing it to compensate for voltage drop across long cable runs. Without it, your battery might never reach full charge, especially if your battery is located far from the engine bay.
Wiring Diagrams and Harness Preparation
Replacing the alternator is only half the battle. Your existing wiring harness is built for 6 volts and thinner gauge wires. Leaving it unchanged invites disaster. Thin wires carrying 12-volt currents can overheat, melt insulation, and potentially start fires. You must replace critical circuits with heavier gauge wire.
Start with the ignition circuit. The coil needs more voltage to fire reliably in a 12-volt system. Many builders add a ballast resistor or use a 12-volt specific coil that doesn't require one. Ensure your ignition switch can handle the increased load, or bypass it entirely using a relay controlled by the starter solenoid.
Next, tackle the lighting circuits. Headlights, taillights, and turn signals need upgrading. Replace the stock bulbs with 12-volt equivalents. Check your sockets; some 6-volt sockets have poor contact surfaces that cause arcing. Clean them thoroughly or replace them with modern brass sockets.
Grounding is critical. A 12-volt system relies on solid ground connections to function correctly. Inspect all ground straps between the engine, transmission, and chassis. Remove paint and rust until you see bare metal. Add additional ground wires from the engine block to the chassis near the battery to reduce electrical noise and improve starting performance.
- Identify Power Feeds: Locate where main power enters the cabin (ignition switch, fuse box).
- Upgrade Gauge: Replace primary cables with 10-gauge or thicker wire depending on amperage draw.
- Install Fuses: Protect every new circuit with an appropriately rated inline fuse holder close to the power source.
- Label Everything: Use heat shrink tubing with printed labels to identify each wire's function for future troubleshooting.
Battery Selection and Placement
Your old 6-volt battery cannot be used. You need a standard 12-volt automotive battery. Size matters here. Classic cars often have tight spaces in the trunk or under the seat. Measure carefully before buying. Group size 24, 27, or 31 batteries are common choices for muscle cars and sedans.
Placement affects wiring length and safety. Ideally, keep the battery as close to the starter motor as possible to minimize voltage drop during cranking. If you move the battery to the trunk for weight distribution, you must run a massive gauge cable (often 2/0 or 4/0) from the trunk to the engine bay. Include a remote cutoff switch in the trunk line for security and emergency shutoff.
Don't forget ventilation. Batteries emit hydrogen gas when charging. If enclosed in a compartment, ensure there are vents to allow gases to escape. A simple plastic vent tube directed outward works wonders.

Gauges and Instruments
One overlooked aspect of 12-volt conversions is the instrument cluster. Original 6-volt gauges will burn out instantly if connected to 12 volts. You have three options: replace the entire cluster with a modern aftermarket unit, send your original gauges to a specialist for modification, or install resistors in series with the gauge coils.
Resistors are the cheapest fix but least accurate. They reduce voltage to a level the gauge can tolerate, but fluctuations in system voltage can still skew readings. Modified original gauges retain authenticity and accuracy but cost more. Aftermarket digital clusters offer features like oil pressure monitoring and temperature alerts that weren't available in the 1950s, providing peace of mind on long drives.
Check your speedometer cable drive ratio if you changed tire sizes along with the electrical upgrade. Mismatched ratios will give you incorrect speed readings, leading to unintended speeding tickets.
Testing and Troubleshooting
Before you throw away the old generator, test everything meticulously. Start by connecting the battery and checking for shorts. Turn the key to "on" without starting the engine. Do any fuses blow? If yes, trace back the circuit immediately.
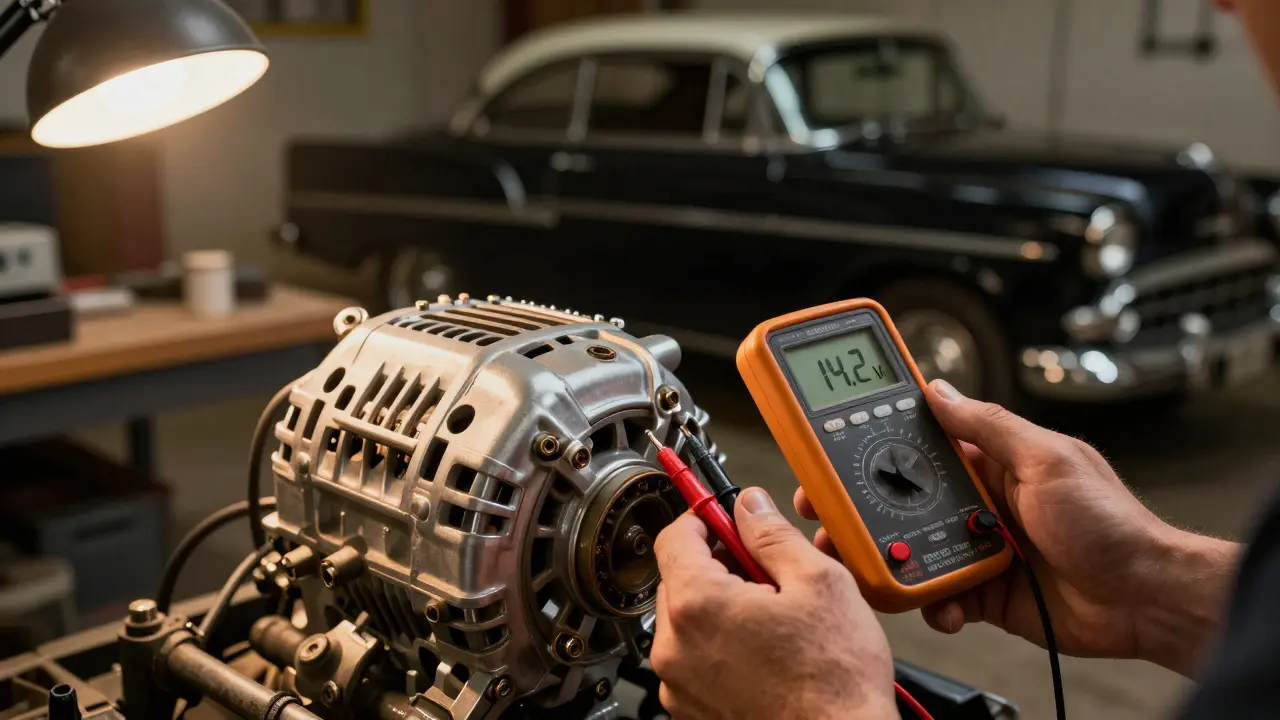
Once cleared, start the engine. Use a multimeter to check voltage at the battery terminals. With the engine running, you should see between 13.5 and 14.5 volts. Anything below 13 volts indicates a charging issue. Anything above 15 volts suggests a faulty regulator, which could boil your battery acid.
Test under load. Turn on headlights, AC, and radio. Voltage should remain stable. If it drops significantly, check your ground connections and belt tension. Loose belts slip, reducing alternator output. Tighten or replace serpentine belts as needed.
If your car has a tachometer, watch the RPM needle. Electrical interference from the alternator can sometimes cause jittery needles. Adding a capacitor across the alternator's output terminal usually solves this noise issue.
Can I keep my original 6-volt generator after converting to 12 volts?
No, you cannot mix 6-volt and 12-volt charging systems. The generator is designed for lower voltage and will fail quickly if subjected to 12 volts. Additionally, the rest of your electrical system expects 12 volts, so keeping the generator defeats the purpose of the conversion. Replace it entirely with an alternator.
Do I need to change my starter motor during a 12-volt conversion?
Yes, almost certainly. A 6-volt starter draws too much current and spins too slowly for efficient operation in a 12-volt system. Swapping to a 12-volt starter ensures faster cranking speeds and less strain on the battery. Make sure the new starter matches the ring gear tooth count of your flywheel.
Is it legal to convert a classic car to 12 volts?
In most regions, including the UK and USA, converting a classic car to 12 volts is perfectly legal and often encouraged for safety reasons. Brighter lights and reliable braking assist (if hydraulic boosters are used) improve roadworthiness. Always check local MOT or inspection requirements regarding headlight brightness and beam pattern.
How much does a 12-volt conversion cost?
Costs vary widely based on DIY skill level. Parts alone (alternator, regulator, battery, wiring kit) typically range from £300 to £800. Labor can double that if you hire a professional electrician. Doing it yourself saves money but requires patience and careful attention to detail to avoid electrical fires.
Will a 12-volt conversion affect my car's value?
For survivor cars meant for static display, purists may prefer originality. However, for driver-quality classics, a clean 12-volt conversion increases usability and appeal to most buyers. Reliability is a major selling point. Just ensure the work looks neat and documented, as sloppy wiring devalues any vehicle.