If you’ve ever tried to stop a classic car built before the 1970s, you know it doesn’t behave like a modern vehicle. The pedal feels spongy, the stopping distance feels longer, and there’s a strange clunk when you brake hard. That’s not a broken brake-it’s the way these systems were designed. Back then, engineers didn’t have the luxury of ABS, power assist, or high-performance pads. They had drums, discs, and one tiny but vital piece: the proportioning valve. Understanding how these parts worked together isn’t just about nostalgia-it’s essential if you’re restoring, driving, or even just curious about old cars.
Drum Brakes: The Original Workhorse
Most classic cars built before 1965 came with drum brakes all around. They weren’t fancy, but they were simple, cheap, and sealed tight against dirt and water. Inside a drum brake, two curved brake shoes lined with friction material press outward against the inside of a rotating steel drum. When you step on the pedal, hydraulic pressure pushes a wheel cylinder, which forces the shoes apart. The friction slows the wheel-and the car.
Drum brakes had one big advantage: self-energizing action. As the drum spun, it pulled the shoes tighter against itself, giving more stopping power with less pedal pressure. That made them perfect for the low-pressure hydraulic systems of the 1950s and early 60s. But they had a fatal flaw: heat. Under repeated braking, the drum would expand and get hot. Heat made the brakes fade-meaning you had to press harder for less stopping power. And if the drum got wet, water trapped inside could cause a sudden loss of grip.
Many owners of 1960s muscle cars still use drum brakes today. But if you’ve ever tried to stop a 1967 Chevrolet Impala with worn drums, you’ll know why many restorers upgrade. A set of new drums with fresh shoes can still work, but only if they’re perfectly adjusted and kept dry. Most don’t last more than 30,000 miles without needing a full rebuild.
Disc Brakes: The Game-Changer
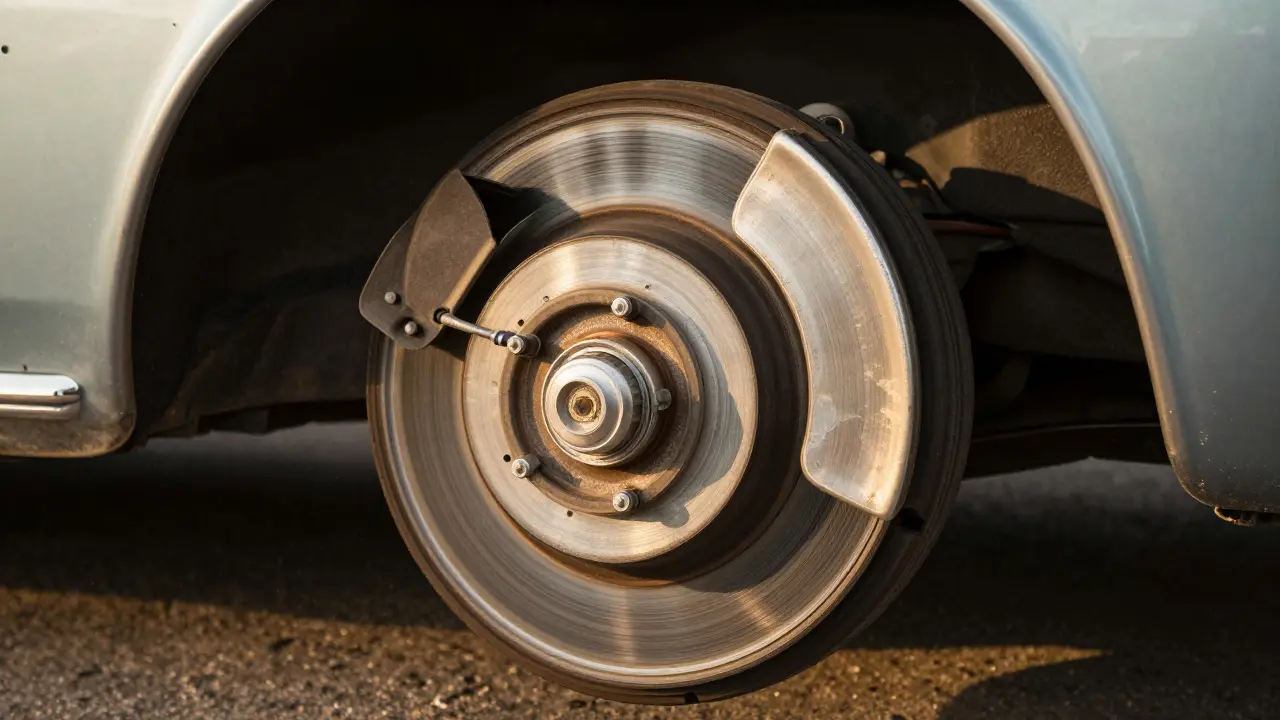
Disc brakes started showing up on performance cars in the late 1950s. Jaguar used them on the E-Type in 1961. Ford put them on the Mustang GT in 1965. By the 1970s, they were standard on most new cars. Why? Because they didn’t overheat like drums.
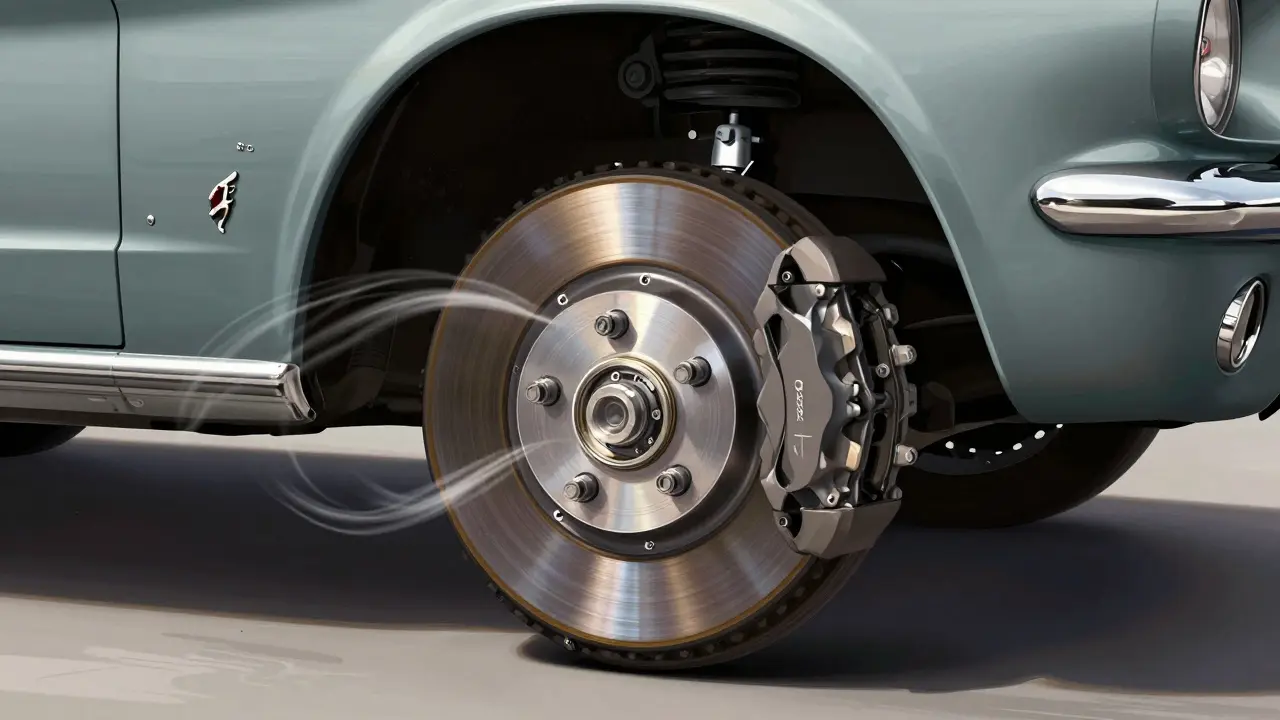
A disc brake system uses a metal rotor (or disc) attached to the wheel hub. Calipers squeeze brake pads against both sides of the rotor. The friction slows the car. Unlike drums, the rotor is open to airflow, so heat escapes quickly. There’s no trapped water. And because the pads don’t rely on self-energizing, they respond more predictably under heavy use.
For classic car drivers, swapping drum brakes for discs is one of the most effective upgrades you can make. A front disc conversion on a 1960s Ford Falcon or a 1968 Volkswagen Beetle can cut stopping distance by nearly 40%. And the pedal feel? It goes from mushy to firm. You don’t need power assist to make it work-just good calipers, quality pads, and a clean hydraulic system.
But here’s the catch: you can’t just bolt on disc brakes and call it done. Older cars were designed for drum brake hydraulic pressure. If you install front discs without adjusting the system, you’ll get uneven braking-or worse, rear wheels locking up before the fronts even bite.
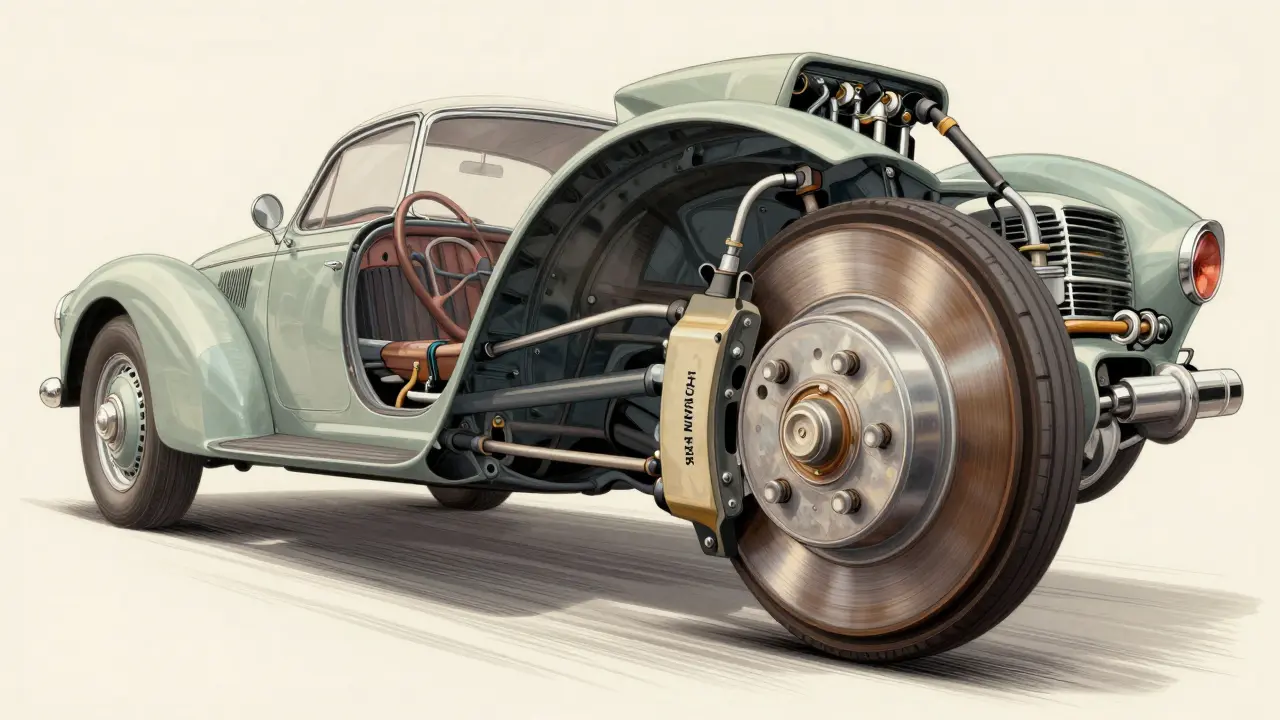
Proportioning Valves: The Silent Hero
This is where the proportioning valve comes in. It’s a small, often overlooked component, usually a silver or black cylinder near the master cylinder or along the rear brake line. Its job? To reduce hydraulic pressure to the rear brakes as you press harder.
Why is this needed? Because when you brake, the car’s weight shifts forward. The front tires grip harder; the rear tires get lighter. If the rear brakes get full pressure, they’ll lock up before the fronts, causing skids or spins. That’s dangerous, especially on wet roads or in a car with no ABS.
Classic drum brake systems didn’t need a proportioning valve because drums were naturally less powerful than discs. But when you swap front drums for discs, you’re introducing a much stronger braking force up front. Now the rear brakes-still drums-can’t keep up. Without a proportioning valve, the rear wheels will lock up the moment you brake hard.
Many aftermarket disc brake kits for classic cars include a proportioning valve. But if you’re doing a DIY upgrade, don’t skip it. A fixed proportioning valve is cheap-under $30. Adjustable ones cost around $80 but let you fine-tune the balance. Set it wrong, and you’ll get poor rear brake performance. Set it right, and your car stops straight, safely, and predictably.
Real-World Examples: What Worked
Take a 1965 Ford Mustang. Factory specs: front drums, rear drums. Stopping from 60 mph? About 180 feet. After a front disc conversion with a properly adjusted proportioning valve? Down to 120 feet. That’s the difference between barely avoiding a collision and walking away.
Another example: a 1971 Chevrolet Impala with factory rear drums and front discs. The owner didn’t install a proportioning valve. The rear brakes locked up every time he braked hard. He thought it was worn pads. It wasn’t. It was pressure imbalance. After adding a valve, the car stopped like it was built in 1990.
On the flip side, a 1957 Chevrolet Bel Air with all-drum brakes and no upgrades? It stops fine on dry roads at low speeds. But in rain? The rear drums get slick, the front drums fade, and the car becomes unpredictable. That’s why many owners of these cars now install front discs and keep the rear drums-paired with a proportioning valve.
What to Upgrade First
If you’re restoring a classic car and want better brakes, here’s what to do in order:
- Replace all rubber brake lines. Old rubber hoses swell under pressure, making the pedal feel soft. Swap them for stainless steel braided lines. You’ll feel the difference immediately.
- Upgrade front drums to discs. This is the single biggest improvement you can make. Kits are available for nearly every classic model.
- Install or adjust a proportioning valve. Don’t assume the original valve works with new discs. Test it. Adjust it. Or replace it with a modern adjustable one.
- Use high-quality brake fluid. DOT 4 or DOT 5.1 fluid resists boiling better than old DOT 3. Flush the system every two years.
- Consider rear disc conversion only if needed. Most classic cars don’t need rear discs. The front discs do 70% of the work. Rear discs add cost, complexity, and weight.
Don’t rush. A full brake job on a classic car takes time. But done right, it’s one of the few upgrades that makes driving safer, more enjoyable, and more authentic.
Common Mistakes and How to Avoid Them
People make the same mistakes over and over with classic car brakes:
- Assuming old parts still work. Brake cylinders dry out. Hoses crack. Shoes wear unevenly. Even if it looks fine, it’s not.
- Ignoring the master cylinder. If your master cylinder is from the 1960s, it might not have enough volume for front discs. You may need to upgrade it too.
- Using the wrong pads. Semi-metallic pads work best for classic cars. Organic pads fade too fast under heat. Ceramic pads? Too quiet and too weak for heavy use.
- Not bleeding the system properly. Air in the lines means spongy brakes. Use a pressure bleeder or have a helper pump the pedal while you open the bleeders. Do it slowly.
- Skipping the proportioning valve. This is the #1 reason people end up with rear-wheel lockup. It’s not optional.
Final Thoughts: Safety Over Style
Classic cars are beautiful. But beauty doesn’t stop a crash. A 1960s car with original drum brakes is a time capsule. A 1960s car with modern discs and a proportioning valve? It’s a time capsule that can still keep up with traffic.
There’s no shame in upgrading. You’re not ruining the car-you’re preserving it. A car that stops well is a car you can drive with confidence. And that’s what matters most when you’re behind the wheel of something built before your parents were born.
Can I use drum brakes on the front of a classic car today?
Technically, yes-but it’s not recommended. Front drum brakes on a classic car built before 1970 are adequate for low-speed driving on dry roads. But they fade quickly under repeated braking, don’t perform well in wet conditions, and offer poor stopping power compared to discs. For safety and reliability, front disc brakes are the standard upgrade for any classic car driven regularly.
Do all classic cars need a proportioning valve?
If your car originally had drum brakes all around, the factory proportioning valve was likely minimal or nonexistent. But if you’ve upgraded to front disc brakes, you absolutely need a proportioning valve. Without it, the rear brakes will lock up before the fronts, creating dangerous instability. Even if your car came with front discs from the factory, the valve may still need adjustment for modern brake fluids or pads.
Can I install rear disc brakes on my classic car?
You can, but it’s rarely necessary. Front brakes handle about 70% of the stopping power. Rear discs add cost, complexity, and weight. Most classic car owners see better results by upgrading the front brakes and using a proportioning valve with the original rear drums. Rear discs are only worth considering if you’re racing the car or using it for heavy towing.
What brake fluid should I use in a classic car?
Use DOT 4 or DOT 5.1 fluid. Older DOT 3 fluid boils at lower temperatures and absorbs moisture faster. DOT 4 has a higher boiling point and better resistance to degradation. Avoid DOT 5 (silicone-based) unless you’re doing a full system rebuild-it doesn’t mix with other fluids and can cause spongy pedals if air gets in. Always flush the system every two years.
How often should I inspect classic car brakes?
Inspect them every 6 months if you drive the car regularly, or before every long trip. Check for fluid leaks, worn brake lines, cracked hoses, and uneven shoe or pad wear. Drum brakes need adjustment every 5,000 miles. Disc brakes need pad checks every 10,000 miles. Don’t wait for warning signs-brake failure in a classic car can be deadly.
Comments
Kristina Kalolo
Front discs on a 1965 Mustang cut stopping distance by 40%? That’s insane. I just did this swap on my ’67 Galaxie and the difference is night and day. No more white-knuckle braking on the highway. The pedal feels solid now, not like stepping on a water balloon.
January 2, 2026 at 16:11
ravi kumar
Good write-up. Many people forget that drum brakes work fine if maintained properly. But yes, if you drive often or in rain, discs are smarter. I did the front disc upgrade on my 1962 Ambassador last year. Best decision ever. No more fade on mountain roads.
January 3, 2026 at 05:20
Megan Blakeman
I just want to say… thank you. 🙏 This post made me cry a little. Not because I’m emotional (okay maybe a little), but because I finally understand why my 1958 Bel Air felt like it was going to flip every time I braked hard. I thought I was a bad driver. Turns out, I just had bad engineering. Proportioning valve? I had no idea. Now I’m ordering one tomorrow. You saved my life, honestly.
January 4, 2026 at 08:24
Akhil Bellam
Of course you’re recommending discs-because you’re clearly a modernist who thinks ‘classic’ means ‘glorified shopping cart with a radio.’ Drum brakes were engineered for their time, with elegance and restraint. You don’t need 120-foot stopping distances-you need character. But fine, go ahead and turn your ’57 Impala into a 2010 Camry with chrome wheels. At least you’ll be safe while you ruin history.
January 5, 2026 at 17:21
Amber Swartz
Okay but have you considered that maybe the reason people are having brake issues is because they’re driving these cars at all?? Like… why are you even on the road with a 60-year-old braking system?? I saw a guy in a ’64 Falcon nearly hit a school bus yesterday-his brakes were literally smoking. This isn’t nostalgia-it’s negligence. Someone needs to regulate this. Like, really. Who lets people drive death traps??
January 6, 2026 at 09:03
Robert Byrne
You missed something critical: the master cylinder. If you’re swapping to front discs on a pre-1970 car, you’re almost certainly using a master cylinder with too small a bore or insufficient reservoir volume. That’s why people get spongy pedals even after the disc swap. You need a dual-reservoir, disc/disc master cylinder-period. No exceptions. And if you don’t know what that is, stop touching your brakes and call a professional. This isn’t a DIY project for people who think ‘bleeding’ means pouring beer into a radiator.
January 8, 2026 at 07:02
Tia Muzdalifah
omg yes!! i upgraded my 68 beetle last summer and now i can actually stop before the squirrels 😅 i was so scared to drive it in the rain before… now i just cruise. also stainless steel lines? total game changer. so much firmer. also i spelled ‘brake’ wrong like 3 times in my notes but u get the vibe
January 9, 2026 at 15:36
Zoe Hill
This is the best thing I’ve read all week. I just got my first classic car-a ’62 Chevy pickup-and I was terrified to drive it. But now I feel like I actually understand how it works. I’m going to do the brake upgrade this weekend. I’ll let you know how it goes. And yes, I’ll get the proportioning valve. I promise. I’m not going to be the person who locks up the rear and spins into a mailbox. 😅
January 10, 2026 at 07:49
Albert Navat
Let’s be real-the proportioning valve is just a band-aid. The real issue is hydraulic inefficiency in vintage systems. You need to account for non-linear pressure curves, fluid compressibility under thermal load, and the fact that most original wheel cylinders have 30% less stroke capacity than modern equivalents. A proper upgrade requires recalibrating the entire hydraulic architecture-not just slapping on a $30 valve and calling it a day. If you’re not measuring pedal travel with a dial indicator, you’re just gambling with physics.
January 10, 2026 at 14:46
King Medoo
People don’t realize how dangerous this is. 🚨 I’ve seen it too many times-people think ‘it’s just a classic car’ so they ignore safety. But safety isn’t optional. It’s a moral obligation. If you drive a car that can’t stop in time, you’re not just risking your life-you’re risking others’. 🙏 I don’t care how ‘authentic’ you want to be. If your brakes can’t handle 50 mph, you shouldn’t be on the road. Period. 🚫🚗💥
January 11, 2026 at 18:53
Rae Blackburn
They’re lying about the proportioning valve. It’s not for safety. It’s a government control tactic. The real reason they push disc brakes is so they can track your braking habits through the new sensors they install with every upgrade. You think they care about your safety? No. They want to know when you brake hard. They want to know if you’re driving too fast. This whole post is propaganda. Don’t trust the system.
January 12, 2026 at 20:20
LeVar Trotter
For anyone new to classic car maintenance: this is textbook-level advice. The order of upgrades listed? Perfect. Start with lines, then discs, then valve. Don’t skip steps. And yes, DOT 4 is the way to go-no exceptions. I mentor new restorers all the time, and this is the one thing I hammer home: brakes are non-negotiable. If you’re not treating them like your life depends on them, you’re not ready to drive. And honestly? That’s okay. Take your time. Learn. Ask questions. We’ve all been there.
January 13, 2026 at 17:24
Tyler Durden
Just did this on my ’69 Camaro last month-front discs, braided lines, adjustable proportioning valve, DOT 5.1 fluid, new master cylinder. Stopped from 60 in 112 feet. I swear I could feel the physics changing. I’m not even a gearhead. I just like driving. But now? I actually enjoy it. You don’t need to be a mechanic to do this. Just follow the steps. And yes, the valve matters. Don’t be the guy who learns the hard way.
January 15, 2026 at 00:13
Aafreen Khan
disc brakes?? lmao. drums are more authentic. also why are we even talking about this like its 2024? my 63 ford has original drums and it stops fine. you just need to pump the pedal. its called driving. also i think proportioning valves are a scam. the government made them up so we’d buy more parts. also i spelled ‘brake’ wrong on purpose. 😘
January 16, 2026 at 19:52