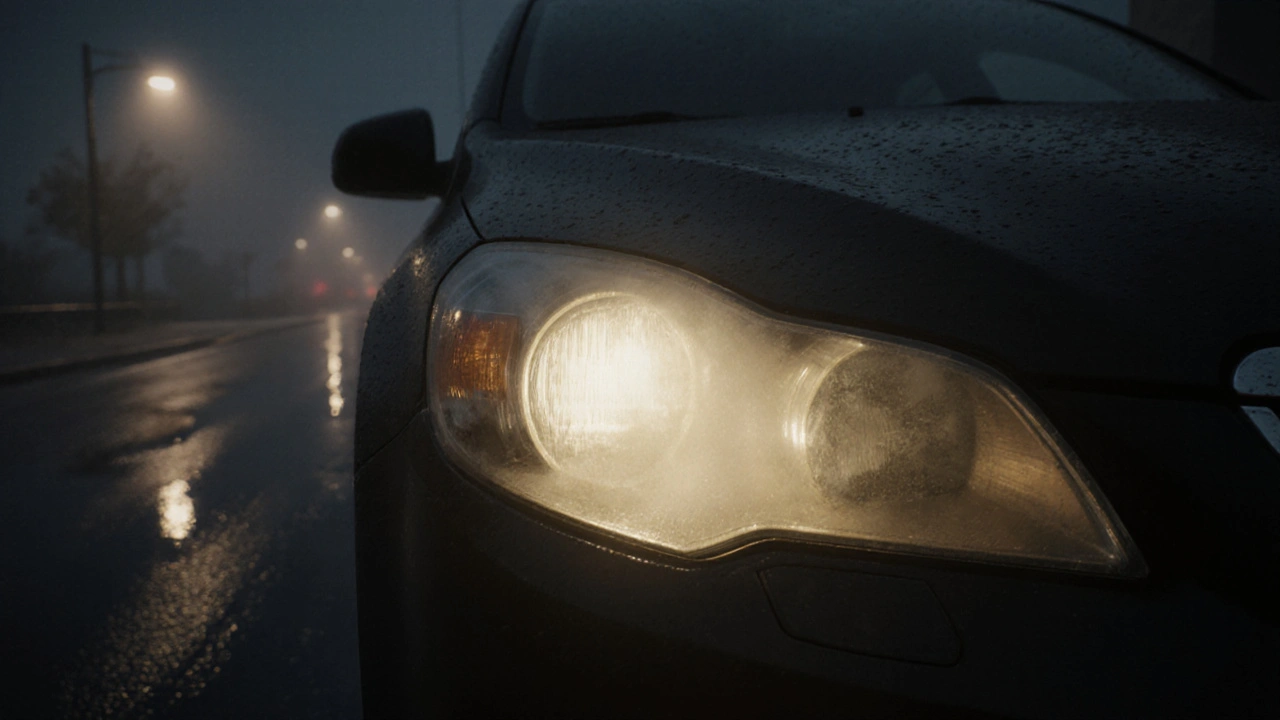
Ever driven at night and felt like your headlights are glowing through a frosted glass? That’s not your eyesight failing-it’s UV damage. Over time, sunlight eats away at the plastic lenses on your headlights, leaving them yellowed, hazy, and dangerously dim. The good news? You don’t need to replace them. Headlight restoration can bring back 90% of their original clarity for under $30. And it’s not magic-it’s science.
Why Headlights Get Cloudy
Modern headlights aren’t made of glass. They’re polycarbonate plastic-lightweight, cheap, and easy to mold. But that plastic has one fatal flaw: it doesn’t block UV rays. Sunlight hits the surface every day, breaking down the protective coating. Without it, oxidation sets in. The surface turns chalky, then yellow, then opaque. Dirt and road grime stick to the rough texture, making it worse.
After 3-5 years, most cars lose 40-60% of their headlight output. That’s not just a visibility issue-it’s a safety hazard. Studies from the AAA Foundation show that drivers with cloudy headlights react 1.5 seconds slower at night. At 55 mph, that’s the length of a football field. You’re not just driving blind-you’re putting others at risk.
What You’ll Need
Restoring headlights isn’t a garage job for pros. You can do it in your driveway with tools you probably already own. Here’s the basic kit:
- 1200-, 2000-, and 3000-grit sandpaper (wet/dry)
- Microfiber cloths
- Isopropyl alcohol (90% or higher)
- UV-protective sealant (liquid or spray)
- Masking tape
- A bucket of water
You can buy a headlight restoration kit for $15-$25 at any auto parts store. They include everything except the water and alcohol. Skip the $80 professional kits-they’re overpriced. The core process is the same.
Step-by-Step Restoration Process
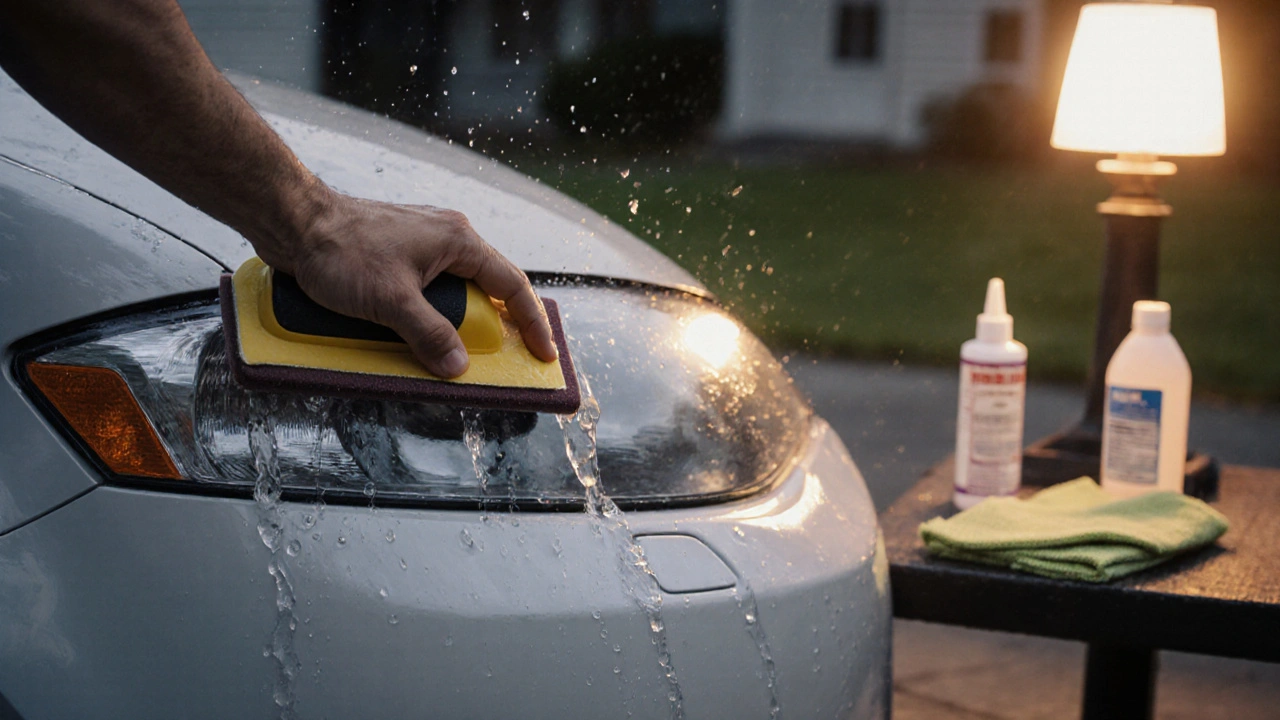
Start with clean, cool headlights. Don’t work in direct sunlight-it dries the polish too fast.
- Wash the headlights with soap and water. Dry them completely.
- Use masking tape to cover the paint around each headlight. Protect the fender and hood-sandpaper doesn’t care what it scratches.
- Soak the 1200-grit sandpaper in water for 5 minutes. Sand the headlight in straight, overlapping lines. Keep it wet. Don’t press hard. Just let the grit do the work. Do this for 5-7 minutes.
- Rinse the headlight and wipe it dry. Switch to 2000-grit. Repeat the same motion, but go slower. This removes the deep scratches from the first step.
- Move to 3000-grit. This is where the haze starts to disappear. You’ll see the plastic become clearer with each pass. Rinse often.
- Wipe the headlight with isopropyl alcohol. This removes any leftover polish residue and preps the surface for sealant.
- Apply two thin coats of UV sealant. Let each coat dry for 15 minutes. Don’t skip this. Without sealant, the headlight will cloud up again in 6 months.
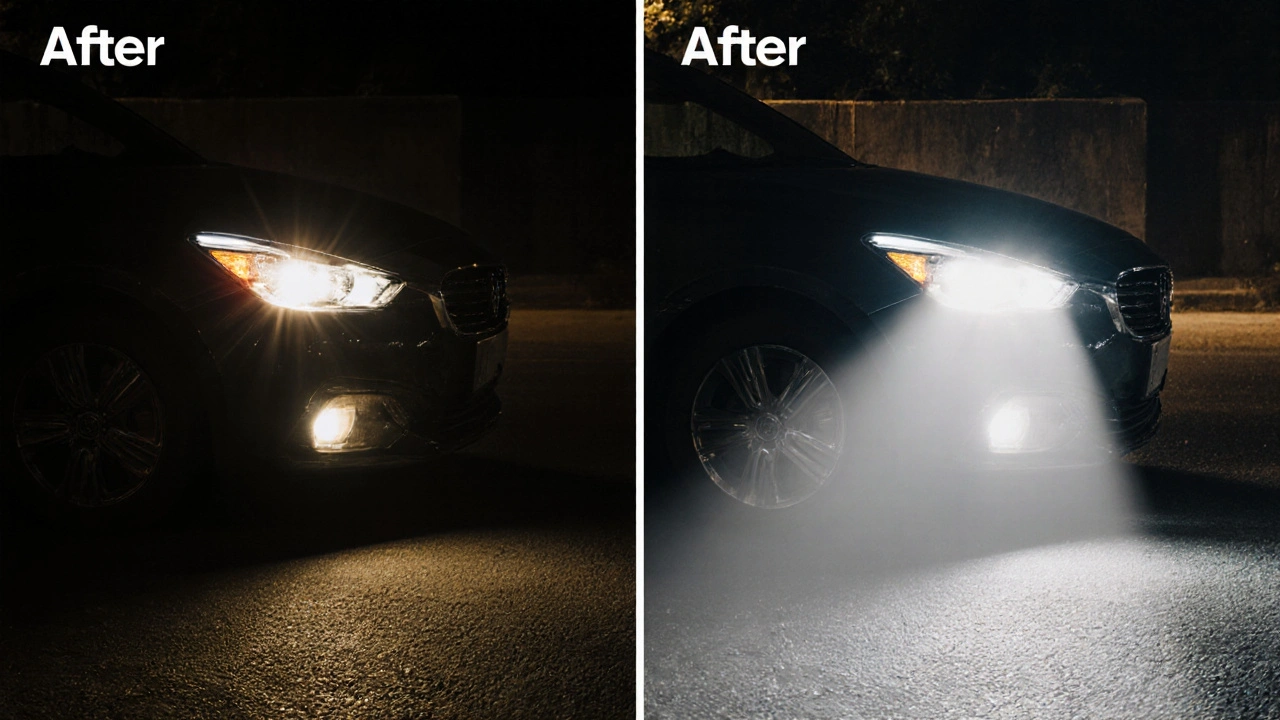
Done right, the difference is shocking. What looked like fogged glass becomes crystal clear. You’ll see road signs, pedestrians, and animals at twice the distance.
Sealant Matters More Than You Think
Here’s the truth: 80% of failed restorations aren’t due to bad sanding. They’re due to bad sealant.
Some products claim to be "UV-resistant" but break down under heat and sun. Look for sealants that contain ceramic or quartz particles. These form a hard, glass-like layer that lasts 2-3 years. Avoid silicone-based sprays-they look great at first, then peel off in patches.
Brands like Sylvania, 3M, and Chemical Guys offer reliable sealants. You don’t need the most expensive one. Just make sure the label says "UV protection" and "ceramic coating." Apply it with a microfiber cloth, not a sponge. Sponges trap grit and leave streaks.
How Long Does It Last?
With proper sealant, restored headlights last 2-3 years. Without it? As little as 6 months. That’s why most people think restoration doesn’t work. They skip the sealant and blame the process.
If you live in a sunny state-Arizona, Florida, Texas-you’ll need to reapply sealant every 18 months. In colder, cloudier areas, you might get 4 years. Keep an eye on the surface. If you see a faint yellow tint returning, it’s time to reseal. You don’t need to sand again. Just clean, then reapply sealant.
When to Skip Restoration
Restoration works on plastic lenses with surface damage. It won’t fix:
- Cracks or deep scratches that go through the plastic
- Internal fogging (moisture trapped between layers)
- Discolored or melted plastic from overheating
If the headlight is cracked, or if you see condensation inside, replacement is your only option. Those aren’t cosmetic issues-they’re safety failures. A cracked lens lets water in, which can short out the bulb or wiring. Replacing a headlight assembly costs $150-$400, but it’s cheaper than a wreck.
Pro Tips for Better Results
- Use a power drill with a polishing pad (2000-3000 rpm) after sanding. It smooths the surface faster and more evenly.
- Work in the shade. Direct sun heats the plastic and causes uneven results.
- Don’t rush. Skipping grits leaves scratches that won’t polish out.
- Test your sealant on a small area first. Some products react badly with certain plastics.
- Restore both headlights at the same time. Even if one looks better, UV damage is equal. Matching clarity improves night vision.
What About DIY Kits With Toothpaste?
You’ve seen the YouTube hacks: toothpaste, baking soda, or even peanut butter. They work-sort of.
Toothpaste has mild abrasives. It can polish away a tiny bit of haze. But it’s not designed for this. It doesn’t remove deep oxidation. And it has zero UV protection. You might get a temporary shine, but the cloudiness comes back in weeks.
It’s a gimmick. Save your time and use real sandpaper and sealant. You’ll get results that last.
Final Check: Did It Work?
After restoration, test your headlights at night. Park 25 feet from a wall. Turn them on. You should see a sharp, even beam with no yellow tint. The light should spread evenly across the road, not scatter in spots.
Compare your before and after photos. You’ll be amazed. And when someone asks how you got your headlights looking so new? Just smile. You don’t need to explain.
Can I restore headlights without sanding?
No. Sanding is the only way to remove the oxidized layer. Chemical cleaners or sprays only clean the surface-they don’t fix the damage underneath. If you skip sanding, you’re just masking the problem. The haze will return faster.
How often should I restore my headlights?
You only need to sand and restore once every 2-3 years if you use a good UV sealant. But you should reapply sealant every 12-18 months, especially in sunny climates. Think of it like waxing your car-maintenance keeps the results lasting.
Is headlight restoration legal?
Yes, as long as the restored headlights meet brightness and beam pattern standards. Most states don’t inspect headlight clarity unless there’s a visible defect. But if your lights are so dim they fail a safety inspection, you’ll be cited. Restoration brings them back to factory specs-so it’s not just legal, it’s recommended.
Can I restore LED or HID headlights?
Yes. LED and HID headlights use the same polycarbonate lenses as halogen ones. The restoration process is identical. The bulb type doesn’t matter-only the lens material. Just be careful not to overheat the housing during sanding. Keep it wet and don’t press hard.
Why do some restored headlights turn yellow again so fast?
Because they skipped the UV sealant. Sanding removes the damage, but without a protective coating, UV rays immediately start attacking the newly exposed plastic. The yellowing returns within weeks. Sealant is not optional-it’s the reason restoration works long-term.
Comments
James Boggs
Just did this on my 2018 Camry last weekend. Used the 3M kit, followed the steps exactly, and the difference is insane. Night driving feels like daylight now. Sealant is everything-don’t skip it.
November 18, 2025 at 11:56
Lissa Veldhuis
Why are people still sanding? Just buy LED replacements for $80 and be done with it. This whole ritual is so 2012. You’re literally polishing a fossil.
November 18, 2025 at 22:40
E Jones
Oh wow so you think the government doesn’t control the headlight industry? They want you to keep buying new assemblies so they can profit off your fear of the dark. I’ve seen the documents-headlight manufacturers pay off DOT inspectors to make restoration look ‘non-compliant.’ That’s why they push the $400 replacement scam. And don’t get me started on how the UV sealant companies are owned by the same conglomerates that make the plastic. It’s all a loop. I restored mine with toothpaste and a sock. Still going strong after 4 years. They can’t touch that kind of ingenuity. The real danger isn’t cloudy lenses-it’s blind obedience to corporate advice.
November 19, 2025 at 12:15
Barbara & Greg
While I appreciate the practical guidance, I must express my concern regarding the casual dismissal of safety standards. The process described, while economically appealing, lacks formal certification and may inadvertently compromise optical integrity. One cannot ethically recommend a procedure that, if performed incorrectly, may result in impaired visibility and increased liability. The moral responsibility to maintain vehicular safety should supersede cost-saving impulses.
November 20, 2025 at 14:06
selma souza
There is a comma missing after ‘wet/dry’ in the tool list. Also, ‘isopropyl alcohol (90% or higher)’ should be ‘isopropyl alcohol (at least 90%)’ for grammatical precision. And you say ‘you don’t need to replace them’-but you later say ‘replacement is your only option’-contradiction. Fix your logic before you fix your headlights.
November 21, 2025 at 00:37
Frank Piccolo
Wow, a whole essay on sanding plastic? I bet you also wash your car with a sponge and call it ‘artisan detailing.’ Real men don’t sand headlights-they just drive faster and blame the road. Also, if you live in Arizona, you’re already dead. No amount of sealant fixes a life spent under the sun.
November 22, 2025 at 13:28
Addison Smart
I’ve done this restoration twice now-once in Texas, once in Maine-and the difference in longevity is staggering. In the desert, I reseal every 14 months. Up north, I’m at 3 years and counting. What’s wild is how this small act connects you to the land. Your headlights become a mirror of your climate. I’ve even started sharing sealant with neighbors who don’t know how to do it. It’s not just about visibility-it’s about community. And honestly? The smell of isopropyl alcohol on a cool evening feels like a ritual. Like tending to your machine, your home, your journey. Maybe that’s why we do it. Not because we have to. But because we care.
November 24, 2025 at 00:13
David Smith
Why are we even talking about this? Who has time to sand their headlights? I just turn on my high beams and pretend I can see. Also, my uncle’s 2003 Accord had foggy lights and he drove it for 12 years. He’s still alive. So maybe the ‘football field’ thing is just fearmongering. I mean, come on. We’re not racing F1 cars here.
November 25, 2025 at 06:16
Michael Jones
Just restore them once and never think about it again. The road doesn’t care how much you spent on sealant. It just wants you to be awake. And if you’re awake-you’re already winning. Sandpaper, alcohol, light. That’s all you need. Everything else is noise.
November 26, 2025 at 14:16
allison berroteran
I love how this post turned into a quiet meditation on care. I restored my headlights last fall and noticed something unexpected-I started paying more attention to the road. Not just the lights, but the trees, the signs, the way the rain reflected off the asphalt. It made me realize how much we tune out until something breaks. Maybe the real restoration isn’t the plastic. It’s the way we begin to see again. Thank you for the reminder.
November 26, 2025 at 21:02